Printing in color II
Reduction, Multiple Plates, and Jig-saw Methods
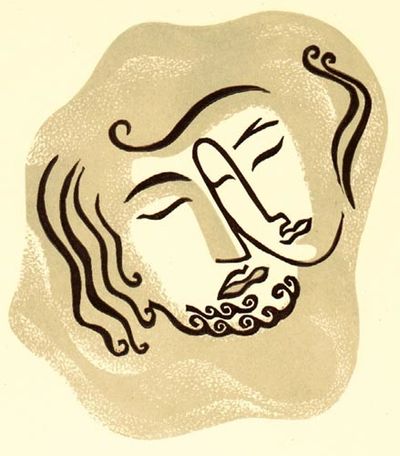
A colored relief print can be done using different methods. When starting a new work, the first important step is to analyze the sketch and decide which method would work best for the particular layout. If one of the colors is just a solid shape (or a scarcely carved plate), more like a background for another more intricate design, it clearly calls for two separate plates.
That what I did for my "Sleeping Lovers" linocut.

With separate plates, one doesn't have to worry to ruin the whole edition by carving something wrong, since the artist can always print additional copies. A reduction print is most effective when several colors distributed evenly across the image.
That is why I chose it for "Monterey Cypresses" linocut.

The reduction method has its apparent benefits: it's easy to register, it requires less carving for every subsequent layer, and takes up just one printing block. But doing a pure reduction print is not always necessary. There were occasions when I opted for making two separate plates for a two-color design which can be done as a reduction. With my "Winter Branches" I spent many hours cutting the intricate lace of branches and twigs (I'm referring to the olive green layer). For this linocut, I planned to print a large edition (50, which is large for me, since I usually do editions of 25-30 for color and 50 for b&w prints), play with different color schemes, possibly use the plate for doing monoprints combining it with additional compositional elements. Shortly, I wasn't keen on ruining this plate cutting a second plate (for black color) out of it. So, I decided to cut a separate plate for the second color. To ensure the first and second plate register, I use the following system: I printed the first plate on smooth paper and while the ink was still fresh, printed it back to another piece of linoleum.

When areas of the same colors are grouped together and do not appear in other areas of the artwork, then doing multiple plates is more efficient. In my "Blooming Orchids" linocut, the bright green is used only for leaves, the pale violet only for flowers, and the orange appears as a tiny spot of orange in the bowl. There was no need to print these colors all over the artwork, so I cut small plates and placed them on the spots where they were supposed to appear.

Pretty often, when analyzing a sketch, I see it calls for a combination of both methods: reduction and multiple plates.
In my "Red Pepper in a Steel Bowl," I printed the first layer with grey. This first plate (the key block) serves two purposes - as the background color for the wall and as the outline for other colors everywhere else. Then for the peppers, I cut multiple plates and printed them in yellow, orange, red, and green, placing each plate carefully on the right spot (which was already outlined in grey). After that, I cut away some parts of the initial (grey) plate and printed it on top of everything in black. So, the first and last stages of the print were done in the reduction method.

To position multiple plates correctly, I usually use a key-block. "Flowers and Fruits" was the first large multicolored still life I did like this.
The key block was initially printed in a very pale color (just dark enough to see the outlines on the paper). The outlines helped me position about 16 plates of various shapes. In the end, I run the key block in black. Later, I started using the first layer of the key block to add a color (see "Red Pepper" linocut above).

Another way to position a spot color correctly is the jigsaw method.
Here is "Tin", a four-color linocut (done for the Periodic Table Printmaking Project) in which gray, red and blue were printed using the jigsaw method, and then overprinted with a key block in black.
At first, I cut a plate for the black outline. Then, I printed it on a smooth paper and before the ink on paper was still fresh, placed over it a clean sheet of linoleum and ran it through the press (a very effective way to transfer a drawing from one plate to another). From a new plate, I cut away all that was supposed to be left white and outlined with the smallest gouge the areas of blue and red. Following these outlines, these small pieces were cut using a coping saw (or a scalpel). For printing, I rolled grey, red and blue inks on the separated plates, and then carefully inserted the small blue and red plates into the "jigsaw". This way, I printed three colors on a single run (very time-saving!). When the inks dried, I printed over the initial black plate which covered the white outlines left around the jigsaw pieces.

There are more ways for doing colors such as rainbow inking (shown on the "Paper Tower II" linocut on the right), monotype inking, and hand-coloring), so with some careful planning, one can choose a technique most suitable for the purpose.
